Screw Compressor Won’t Start: 11 Common Problems and Fixes
Industrial operations experience sudden expensive interruptions when a screw compressor fails to start. The process of running industrial equipment and performing regular maintenance work requires operators to know all root causes of equipment failure because it impacts their ability to keep operations running without interruptions. This blog presents 11 common problems which prevent screw compressors from starting and offers practical solutions for each problem. The guide provides complete diagnostic knowledge which enables you to solve all electrical faults and mechanical failures that occur within your system. The resource assists technicians engineers and facility managers in restoring compressor operations to full function through minimal system interruptions.
Understanding Compressor Starting Problems
Common Causes of Startup Issues
Startup issues in screw compressors can stem from a variety of factors, including inadequate power supply, faulty electrical components, or insufficient lubrication. The motor cannot achieve its necessary starting torque because voltage fluctuations and an undersized power source impede its progress. The startup procedure will experience disruptions when essential electrical components experience failure. The system will experience operational disruptions because mechanical problems create jammed rotors and blocked inlet filters and unbalanced oil levels. The process of identifying and solving common problems requires proper diagnostic methods together with following manufacturer instructions.
How to Diagnose Your Air Compressor
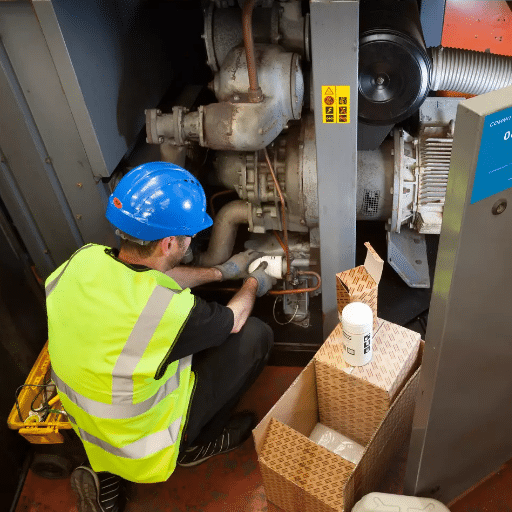
To diagnose your air compressor, start by conducting a visual inspection to check for any obvious issues, such as loose connections, damaged hoses, or oil leaks. The next step involves observing the compressor pressure measurements to confirm their match with standard operating pressure. The presence of rattling or hissing sounds indicates that internal mechanical parts are damaged and air is leaking. The power supply needs to be verified for stability while the electrical system components should be examined for any signs of wear and malfunctioning, including fuses and contactors and relays. The final step requires assessment of the compressor maintenance records to find all overdue filter replacements and oil changes and required maintenance tasks. Your system to find the main problem should start from dealing with all possible problems in the system.
💡 Key Diagnostic Checklist
- Visual inspection of connections and components
- Pressure measurement verification
- Sound analysis for abnormal noises
- Power supply stability check
- Maintenance record review
The Role of Power Supply in Compressor Function
The performance of a compressor depends on having a power supply that delivers both adequate power and stable operation because any power fluctuations or interruptions will result in equipment malfunctions and operational inefficiencies. Compressors need uninterrupted power supply, which provides both voltage and current to run their motor systems and control apparatus. Voltage drops and surges create conditions that lead to equipment damage through motor overheating and protective shutdowns, which result in operational interruptions. Modern compressors utilize both soft starters and variable frequency drives (VFDs) to address power supply issues while improving their energy-efficient operations. The compressor will achieve improved reliability and extended operational lifespan through proper electrical system setup and ongoing power supply system monitoring procedures.
Troubleshooting Your Air Compressor

Checking the Pressure Switch Settings
The pressure switch is a critical component that regulates when your air compressor turns on and off by monitoring the system pressure. First, you need to disconnect the power supply to check the pressure switch settings because it ensures your safety. The pressure switch housing contains adjustment screws which control two different functions: one screw operates the cut-in pressure that activates the compressor and the other screw manages the cut-out pressure which deactivates the compressor. The manufacturer recommended pressure range enables you to use a screwdriver for precise setting adjustments through this method. Short cycling and excessive pressure buildup both create operational problems that need precise control to prevent them from damaging your system. After completing any adjustments to the air compressor system you must conduct operational tests to confirm that everything works correctly. For any major issues or advanced adjustments, consulting a professional technician is advised.
⚠️ Safety Warning
Always disconnect the power supply before adjusting pressure switch settings. Working with live electrical components can result in serious injury or death.
Examining the Unloader Valve Function
The unloader valve operates as a vital element in an air compressor system because it releases the stored air which remains trapped inside the pump head after the compressor motor stops working. This function is essential as it prevents pressure buildup that could cause the motor to struggle or fail upon restarting. The switch activates the unloader valve when the air compressor reaches its cut-off pressure which enables excess air to escape through a small release mechanism. Proper unloader valve operation helps compressors to restart better while it reduces motor wear and increases compressor efficiency and operational life. The unloader valve requires immediate assessment and repair when it fails because system operation will then experience short cycles and startup failures.
Identifying Faulty Components in Your Compressor
You should begin your search for broken parts in your compressor by looking for typical malfunction symptoms which include strange sounds and decreased airflow and excessive shaking and the machine’s inability to keep up with its normal pressure levels. The air filters need inspection because blockages will reduce their performance. The unloader valve must be checked for leaks because it should operate correctly and the pressure switch needs testing at multiple pressure points to confirm its operation. Air leaks produce sounds that need to be detected at hose connections and tank joints while the motor needs to be examined for signs of overheating and wear. The multimeter allows you to confirm the state of electrical connections because it will detect shorts and damaged wiring which disrupt compressor operations. The process of regular diagnostic testing and maintenance work is necessary to discover and fix problems without delay.
Repairing Electrical Issues

Assessing the Contactor for Malfunctions
The process of evaluating the contactor for faults starts with visual inspection to find physical damage which includes burns and corrosion and pitting that affects electrical conduction. Use a multimeter to test the coil for continuity; a lack of continuity may indicate a burnt-out coil. The next step requires checking contactor terminals during their operational state to confirm whether they receive correct power supply. The contactor will not operate correctly if it experiences mechanical sticking or electrical failure which causes it to refrain from engaging or disengaging. The most effective method to restore compressor operation requires contactor replacement when the existing contactor becomes defective.
| Contactor Issue | Symptoms | Solution |
|---|---|---|
| Burnt Coil | No continuity on multimeter test | Replace contactor |
| Pitting/Corrosion | Poor electrical conduction | Clean or replace contacts |
| Mechanical Sticking | Failure to engage/disengage | Lubricate or replace |
Investigating Overload Protection Mechanisms
Overload protection mechanisms are critical components designed to prevent electrical equipment from surpassing its designed operational limits which could lead to overheating damage or failure. Modern overload devices such as thermal overload relays and electronic overload protectors continuously monitor current flow to the connected equipment. These mechanisms trigger a circuit interruption when they detect excessive current which prevents the system from experiencing prolonged stress. Electronic overload protection technology now enables users to define trip thresholds through specific settings while systems deliver communication functions that support automated monitoring to enhance diagnostic and protective capabilities.
Addressing Power Supply Concerns
Power supply concerns need solutions which maintain system reliability and operational efficiency while providing complete failure protection. Modern power management systems use uninterruptible power supplies (UPS) and power conditioning devices to protect against voltage fluctuations and surge events and power outages. Energy storage solutions which include batteries and supercapacitors offer backup power during system interruptions. Smart grid technologies provide improved supply stability through their capability to monitor system status in real time and distribute power loads. Regular system maintenance with scheduled testing together with following established industry practices will deliver reliable system functionality while reducing equipment outage duration.
Mechanical Issues Affecting Startup
Inspecting the Air End for Faults
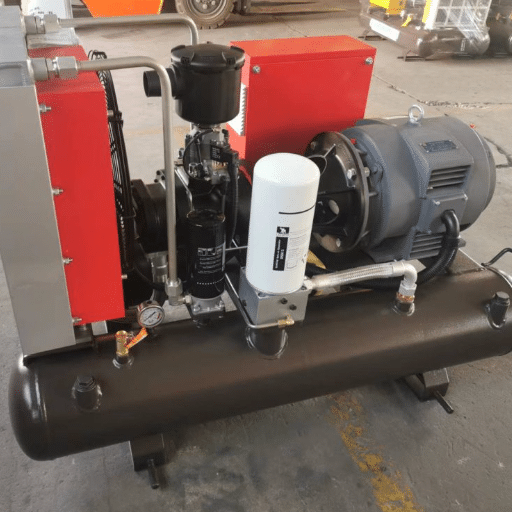
The air end serves as a vital part of rotary screw compressors which requires assessment through testing for three specific problems. The system needs continuous monitoring to detect oil leaks and contamination because these issues directly affect efficiency while causing equipment to malfunction earlier than expected. The maintenance process needs to maintain equipment alignment within manufacturer standards, while technicians must test pressure and temperature operations to track any operational changes. The use of predictive tools which include vibration analysis and thermal imaging enables organizations to detect hidden issues before they become serious problems that would disrupt business operations.
🔧 Best Practices for Air End Inspection
- Monitor for oil leaks and contamination regularly
- Verify alignment meets manufacturer specifications
- Test pressure and temperature during operation
- Use vibration analysis for predictive maintenance
- Employ thermal imaging to detect hidden problems
The Function of Valves in Compressor Systems
Valves control gas or air flow throughout the compression cycle to ensure proper compressor operation. The system uses valves to control gas intake and discharge, which helps maintain proper pressure levels while preventing backflow. The introduction of high-performance materials together with precise engineering through contemporary valve technology results in greater product longevity and decreased energy consumption, which improves compressor efficiency. The system uses valves as gatekeepers to achieve maximum efficiency of operations while preventing damage that would occur through improper flow conditions. The components require regular inspection and maintenance because these activities establish the foundation for maintaining operational reliability and system integrity.
The Process of Identifying Hum Sounds
The first step to understanding hum and other system noises requires sound source identification and sound type determination. Humming noises may stem from components such as motors, transformers, or electrical wiring due to issues like loose connections, electromagnetic interference, or vibration. The presence of clicking or knocking sounds indicates mechanical malfunctions that result from misalignment or wear, which creates blockages in the operation of moving parts. The equipment can identify the problem source through the use of decibel meters and thermal imaging systems and vibration analyzers. The process of system integrity maintenance requires three main tasks, which include conducting routine maintenance, securing any loose parts, and checking for electrical faults and wear signs.
| Sound Type | Possible Cause | Diagnostic Tool |
|---|---|---|
| Humming | Loose connections, electromagnetic interference | Decibel meter |
| Clicking | Misalignment, worn parts | Vibration analyzer |
| Knocking | Mechanical blockage, component wear | Thermal imaging |
Getting Your Compressor Back to Work

Step-by-Step Repair Guide
- Disconnect Power
The inspection and repair process requires complete power shutdown and disconnection of the compressor from its electrical source to ensure safety from electrical dangers. - Inspect Components
The visible components, which include belts and seals and valves and hoses, need examination to identify any signs of damage or wear. The inspection process requires checking for both loose connections and misaligned parts. - Check for Blockages
The process requires removing all obstacles that exist in both intake and exhaust vents while maintaining proper airflow. - Examine Lubrication Levels
The process requires checking oil levels in accordance with manufacturer guidelines and refilling oil to correct any deficiencies. - Test Electrical Systems
The multimeter will be used to measure voltage levels while the technician uses it to detect wiring faults and connection issues. - Replace Damaged Parts
The team will replace all broken and worn components with suitable replacement parts which include gaskets and valves. - Reassemble and Test
The team needs to restore complete functionality by reestablishing all secured components and conducting performance tests to check for operational and sound-related problems. - Schedule Preventative Maintenance
The team needs to establish an ongoing maintenance program which will help compressor systems work at their best while extending their serviceable lifespan.
When to Call a Professional Technician
The system requires professional assistance when compressor problems continue to occur after maintenance work and the system produces strange sounds and it operates through short cycles and there are visible signs of refrigerant leaks and electrical faults. The specialized tools that professionals use together with their expertise enable them to resolve complex issues which include motor failures and system blockages while they repair systems to meet safety regulations. The system requires a certified technician to operate refrigerants because the law mandates that only certified professionals should handle them.
🚨 Call a Professional If:
- Problems persist after basic maintenance
- Unusual sounds continue or worsen
- Short cycling occurs repeatedly
- Refrigerant leaks are visible
- Complex electrical faults are present
- Motor failures are suspected
Preventative Maintenance to Avoid Future Issues
Your system needs regular maintenance work because it helps to extend equipment life while decreasing repair expenses. The procedure requires staff members to replace or clean filters every one to three months which ensures that proper airflow continues through the system. The procedure requires staff members to inspect and clean condenser and evaporator coils because buildup needs to be eliminated to maintain operational efficiency. Staff members need to examine all electrical connections to identify any loose parts and to check the condition of their electrical components. At least one annual professional service visit enables technicians to check refrigerant levels and calibrate thermostats and they can optimize the entire system. The organization can decrease its chances of experiencing major equipment breakdowns by solving minor problems which emerge during normal maintenance work.
| Maintenance Task | Frequency | Purpose |
|---|---|---|
| Filter Replacement/Cleaning | Every 1-3 months | Ensure proper airflow |
| Coil Inspection & Cleaning | Quarterly | Maintain operational efficiency |
| Electrical Connection Check | Semi-annually | Prevent electrical failures |
| Professional Service Visit | Annually | Comprehensive system optimization |
References
-
Air Conditioning Compressor Guide: Types, Issues, & Fixes
Crown College
This guide provides insights into common compressor issues and their fixes. -
Common Air Conditioning Issues in Florida and How to Deal
Florida Academy
Discusses troubleshooting steps for air conditioning compressors. -
SC Metomil SC 200 Liters Compressor: Your Guide
Crown College
Frequently Asked Questions (FAQ)
Summary
Understanding the common problems that prevent screw compressors from starting enables maintenance teams and facility operators to minimize costly downtime and maintain operational efficiency. This comprehensive guide covers electrical issues, mechanical failures, and preventative maintenance strategies that keep industrial compressor systems running reliably. Regular inspection, proper diagnostics, and timely repairs will extend equipment lifespan while reducing unexpected failures.