
Screw Compressor Oil Carryover: Causes, Diagnostics, and Fixes
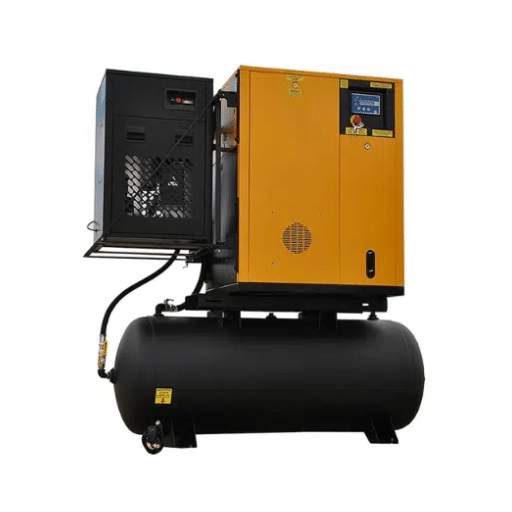
Ray, a maintenance lead at a metal fabrication shop, replaced his separator element because oil was showing up in the air lines. The oil kept coming, so he replaced it again. By the third element, someone finally checked the small return line running back to the airend and found it blocked.
The oil was never getting past the element. It was never getting back to the sump.
That is the most common pattern in screw compressor oil carryover, and it is also the most expensive one. The parts are cheap. The repeat labour is not. Field-service reports point the same way: in most cases of carryover that follow a brand-new separator, the element was not the cause.
So do two things before you order anything. Put a number on how much oil is leaving the machine. Then follow an order of checks that ends at the real cause instead of stopping at the first plausible one.
Air compressor oil carryover has about eight causes in a rotary screw, and from the outside they look almost identical.
For the full picture, including sizing, oil selection, and total cost of ownership, see our complete oil-injected rotary screw compressor guide.
What Screw Compressor Oil Carryover Is (and What It Isn’t)

Every oil-injected rotary screw compressor carries some oil out with the air. That’s not a fault; it’s a design consequence. The airend injects oil to seal, lubricate, cool, and clean the compression chamber, and the separator removes all but a trace. What leaves is measured in parts per million by weight.
The argument starts when “a little” becomes “a lot.” For a lubricated rotary screw, normal carryover is commonly cited at 2-10 ppm by weight, varying with machine age and maintenance. Below that band, most operators have nothing to fix. Above it, rotary screw compressor oil consumption climbs, and you pay twice: once at the top-up, and again downstream in loaded dryers, saturated coalescers, and contaminated product.
Acceptable carryover also depends on your application. A workshop running impact wrenches tolerates far more oil than a food line with direct air contact. Don’t chase a universal figure. Chase the figure your process actually needs.
Four Problems That Look Identical
Before you touch the machine, be sure you have the right problem. Oil where it should not be comes from four places.
| Problem | What you see | Next step |
|---|---|---|
| Internal carryover | Oil in the airstream at the compressor discharge; consumption tracks running hours | Run the diagnostic sequence below |
| External leak | Oil on the floor or the machine; compressor oil loss with clean air downstream | Pressure-test seals, fittings, and hoses |
| Residual installation oil | Oily air at one point of use only; clears over weeks; consumption normal | Flush the affected branch piping |
| Condensation, not oil | Milky emulsion, rust, worse in humid weather | Fix drainage and drying first |
A plant that treats condensate as carryover buys separators forever. So does a plant that treats an external leak as carryover. Get onto the right problem before you buy anything.
Quantify the Loss Before You Diagnose It
You can’t fix what you can’t measure, and you can’t argue about “normal” without a number. You don’t need a lab for this. You need a top-up log and the hour meter.
The Consumption-Rate Method
- Record the oil level with the machine shut down and depressurised.
- Log every top-up in litres (or quarts) for the next 500-1,000 running hours.
- Divide total top-up volume by running hours, then multiply by 1,000.
That gives you litres per 1,000 hours. As a working guide, up to 1-2 L/1,000 h is normal, and 5 L/1,000 h or more is abnormal. A level falling from MAX to below MIN in roughly ten days is abnormal no matter what the maths says.
For context, CAGI has a worked example that makes this concrete: a 50 hp compressor at 250 scfm, running 8,000 hours at 4 ppm(w), passes about 4.8 US gallons of lubricant into the system in one year. That’s the figure that stops a plant from calling it “a bit of oil.”
What Normal Looks Like
| Measure | Typical band | Abnormal |
|---|---|---|
| Carryover rate | 2-10 ppm(w) | Persistent reading above band |
| Concern threshold | below ~4 ppm(w) | above 4 ppm(w) |
| Consumption | ≤1-2 L/1,000 h | ≥5 L/1,000 h, or MAX→MIN in ~10 days |
Treat these as bands, not laws. Check your own manual and your own process limit first.
ppm(w) and mg/m³ Are Not Interchangeable
This is where buyers go wrong. Separator specifications are usually quoted in ppm by weight. ISO 8573-1 purity classes are quoted in mg/m³. They are different measurements and cannot be swapped.
ISO 8573-1:2010 total-oil classes run Class 1 ≤0.01 mg/m³, Class 2 ≤0.1, Class 3 ≤1, and Class 4 ≤5 mg/m³. Note that Class 0 isn’t zero oil; it’s a limit you and your supplier define, and it must be stricter than Class 1. A carryover figure in ppm(w) isn’t a purity class, and treating it as one leads to the wrong acceptance decision. See our guide to ISO 8573-1 air purity classes for the full table.
If a spec sheet is nudging you toward an oil-free machine to solve a marginal contamination problem, our oil-free vs oil-lubricated comparison explains when that switch is genuinely necessary.
Sampling Without a Lab
If you need to know where the oil enters, sample at five points: compressor discharge (P0), after the dryer (P1), after the filters (P2), at the main header (P3), and at the point of use (P4). Oil that shows up only at P4 is a branch-piping or local-lubricator problem, not a compressor problem.
If you’re not sure whether your consumption is normal, send us your top-up record and running hours, and we’ll work it out with you.
The Diagnostic Sequence: An Ordered Decision Tree

This is the part most guides skip. A list of causes tells you what to check. It doesn’t tell you what to do when a check comes back normal.
Here is the order, cheapest and most likely first. At every step, a normal finding means you move to the next node, not that you stop.
Step 1: Confirm the Symptom and Fix the Sampling Point
Run the lookalike check above. Confirm the oil is at the compressor discharge and that consumption tracks running hours. If it doesn’t, stop here. You’ve got a different problem, and no amount of separator work will fix it.
Step 2: Check the Oil Level the Way Your Manual Says
Most manuals specify the method: shut down, depressurise, let the foam settle, then read the sight glass. During operation, the correct level is usually around two-thirds of the glass. An overfilled sump whips oil into foam the separator can’t handle. It’s one of the most common causes, and one of the easiest to fix.
Step 3: The Scavenge Line: Touch Test and Blow-Through Test
Run the machine under load and touch the return line from the separator tank back to the air end. Warm means oil is flowing. Cold means it is not.
Confirm by disconnecting the line and blowing shop air through it toward the separator; resistance means an obstruction. Remove the orifice fitting and check valve and hold them to the light; the pinhole is typically 0.8-1.5 mm (field guides often specify a clear ~1.0 mm hole). A blocked return line is the single most misdiagnosed cause of carryover.
Step 4: Separator Differential Pressure and Element Condition
A new element commonly runs 0.1-0.2 bar, and replacement is commonly flagged above 0.8 bar. But ΔP tells you about restriction, not tears. A punctured element can show near-zero ΔP while passing oil. For the full threshold table, element inspection, and replacement procedure, see our guide to air/oil separator differential pressure and replacement.
Step 5: Operating Temperature
Design oil temperature sits around 80-95 °C. Above roughly 105 °C, oil begins to vaporise faster than mechanical coalescing can catch it, and it condenses downstream as liquid. Many field guides use 100 °C (212 °F) as the concern line.
Vapour is not a separator problem, so a new element won’t touch it. If you want the oil circuit in full, see how an oil-injected screw compressor works.
Step 6: Vessel Pressure and the Minimum Pressure Valve
The minimum pressure valve holds pressure in the separator tank so the element can work. If it fails open, or if the machine runs at low vessel pressure (one documented case ran a 7-bar machine at 4 bar), air velocity through the element rises and drags oil through with it.
Step 7: Oil Condition and Chemistry
Wrong grade, mixed brands, water contamination, oxidation, and foaming all increase carryover. Look for a “milkshake” in the sight glass, which signals foaming. For grade selection and change intervals, see our rotary screw compressor oil guide.
Step 8: Load Profile, Duty Cycle, and Multi-Compressor Control
Is the machine running lightly loaded? Is a VSD holding minimum speed while a second compressor carries the base load? This is the system’s cause, and it is invisible to anyone only checking parts. It gets its own section below.
When to Stop and Call a Technician
Some checks are operator-safe: reading a gauge, reading the hour meter, the touch test, checking the oil level. Some are not: opening the separator housing, removing an element, or working on any pressurised part.
Pressing Stop is not isolation. Isolate, lock out, and verify zero pressure before opening anything. If your machine has no documented depressurisation procedure, stop and call a technician.
The Causes of Screw Compressor Oil Carryover, Ranked by How Often They’re the Real One

Blocked or Misrouted Scavenge Line: The Most Misdiagnosed Cause
Oil stripped from the air pools at the base of the element and is drawn back to the air end through a small orifice. If the line, orifice, or check valve clogs with carbon or sludge, that oil has nowhere to go, so it’s pushed downstream.
Misrouting matters too. On machines with two similar return hoses, crossed connections during service block the return path. That happened at a food plant: carryover began right after a service and cleared up with no parts once the hoses were reconnected correctly.
Overfilled Sump
Worth repeating because it is free to fix. Overfilling foams the oil, and foam overwhelms the separator.
Saturated, Collapsed, or Wrong Element
A saturated element blinds with contamination, a collapsed one distorts and bypasses, and a wrong one may not seal. All three pass oil. This is where separator selection and replacement guidance applies.
Light Loading and VSD Below Minimum Speed
Here’s the cause almost everyone omits. Below roughly 30% of capacity, airflow through the machine drops enough to upset the balance between oil injection and air velocity, and oil mist escapes. VSD machines are commonly held in a 50-80% capacity band for exactly this reason. Sustained operation below about 50% risks instability, and some designs open a supplemental-oiling solenoid at around 50-60% of full-load speed to compensate.
The symptoms mislead. A plant sees carryover downstream of the dryer and filters and assumes the separator is failing. In a documented fish-processing case, the machine was a VSD running at minimum speed while a second compressor carried the load. The fix was control logic that let the machine stop, not parts.
High Discharge Temperature and Oil Vaporisation
Above the vaporisation line, oil leaves as vapour and condenses downstream. Consumption climbs with ambient temperature, so a problem that appears every summer is often thermal, not mechanical.
Wrong, Mixed, or Degraded Oil, and Foaming
Topping up with a different chemistry can cause foaming and early separator saturation. Fresh oil of the wrong viscosity behaves like old oil.
Minimum Pressure Valve and Low Vessel Pressure
A failed MPV or low vessel pressure raises air velocity through the element and drags oil through.
Worn Seals, Gaskets, and Internal Bypass
A reused or hardened housing gasket, uneven bolt torque, or a misaligned guide bar can create a path that bypasses the element entirely. These are assembly faults rather than wear faults, and they stay invisible unless you know to look.
The Signal in a New Element That Changed Nothing
If you fit a fresh separator and the symptom is unchanged, that’s diagnostic gold. It tells you the element wasn’t the cause. Field-service reports on post-replacement carryover put the element at fault in only a minority of cases (roughly 12-20%, depending on the machine family). The oil is leaving by another route: the return path, the level, the oil, the load profile, or the vessel pressure.
Fixes, in the Order You Should Apply Them
Fix oil carryover in cost order. The cheapest fixes are also the most common ones.
Fix the Return Path First
Clean the scavenge line, orifice, and check valve before you replace the element. A new element fitted over a blocked return line will blind within weeks, and you’ll be back where you started.
Field guidance is to clean the circuit at least once a year or every 1,000 hours. After cleaning, run the machine at rated pressure for 30-40 minutes to let it stabilise.
Fix the Oil Level and the Oil
Correct the level using your manual’s method. If the oil is degraded, mixed, or contaminated, change it. When you do change the separator, treat it as a set: separator, oil filter, lubricant, and a clean scavenge circuit. Doing three of the four is how plants end up replacing elements repeatedly.
Fix the Load Profile and the Control Logic
If the machine runs lightly loaded, or a VSD sits at minimum speed, the fix may be a control setting, a sequencing change, or letting the machine stop and start instead of modulating. It costs nothing in parts and is invisible to anyone who only inspects hardware.
Fix the Separation Hardware
Only once the above are ruled out, replace the element using the manufacturer’s procedure, with the correct part and correct torque.
Fix What Carryover Has Already Damaged Downstream
Change loaded coalescers and dryer filters, check the drains, and inspect branch piping for residual oil. Carryover that has been running for months leaves oil everywhere it passed.
When you reach this stage, treat the separator, oil filter, and lubricant as a single job, and set the change interval from your own manual. Buying the right parts once is cheaper than replacing elements repeatedly.
What Oil Carryover Costs You
The Parts You Buy by Guessing
Every separator you buy to fix a non-separator problem is a wasted part plus wasted labour. Plants that misdiagnose do this several times a year.
Downstream: Dryers, Coalescers, Drains, and Product
Oil that leaves the compressor loads everything after it. A mist eliminator can get below ~0.1 mg/m³, activated carbon to around 0.003, and catalytic treatment to roughly 0.001, but those stages cost money, and they saturate faster when carryover is high. In food, pharmaceutical, or any direct-contact application, the real cost is rejected product.
The Energy Side
Oil carryover and differential pressure often travel together. Every 1 bar of separator ΔP corresponds to roughly 6-7% higher energy consumption. A restricted separator that is also passing oil costs you on both the oil and the power bill.
Frequently Asked Questions About Screw Compressor Oil Carryover
Why is there oil in my compressed air lines?
Some oil is normal. Lubricated rotary screws commonly carry over 2-10 ppm(w). Excessive oil usually points to a blocked return path, an overfilled sump, a saturated element, light loading, or high temperature. Measure the loss before assuming it is the separator.
How much oil carryover is normal for a screw compressor?
Commonly cited at 2-10 ppm(w), or roughly 1-2 L per 1,000 running hours. Above about 4 ppm(w) is often treated as a concern line. Acceptable levels depend on your application, so check your manual and your process limit.
How do I know if my oil separator is bad?
Look at differential pressure. A new element runs about 0.1-0.2 bar and is commonly replaced above 0.8 bar. But a torn element can show near-zero ΔP while passing oil, so also watch consumption and check for a pool of oil in the removed element.
Can I fix carryover just by replacing the separator?
Usually not. If a fresh element doesn’t change the symptom, the element wasn’t the cause. Field data suggests most post-replacement carryover traces to the return path, oil level, oil condition, load profile, or vessel pressure.
Why does my compressor use oil but not leak?
Because the oil is leaving with the air, not through a leak. Confirm by sampling: if downstream air is oily but the machine and floor are dry, it is carryover. If the floor is wet and downstream air is clean, it is an external leak.
Is oil carryover worse at light load?
Yes. Below roughly 30% of capacity, the airflow drops enough to let oil mist escape, which is why VSD machines are usually held in a 50-80% band. On lightly loaded machines, the fix is often control logic, not parts.
Conclusion
Screw compressor oil carryover is not a separator problem until you have proved it is. The plants that fix it cheaply do three things, in order.
This week:
- Put a number on the loss, top-ups plus running hours, converted to L/1,000 h.
- Confirm you have carryover, not a leak, residual installation oil, or condensation.
- Run the touch test on the return line with the machine under load.
This month:
- Clean the scavenge line, orifice, and check valve.
- Correct the oil level and address oil condition.
- Review the load profile and control logic on lightly loaded or VSD machines.
Only then look at the element.
If you’d rather not work it out alone, contact our team with your compressor model, running hours, and top-up record. We’ll help you identify the cause, specify the right separator, filter, and lubricant, and get service kits to your market.
For the wider picture, see our complete guide to oil-injected rotary screw compressors.
Chasing oil carryover on a lubricated screw compressor and not sure whether the separator is really due? Send our team your model, running hours, and top-up record, and we’ll help you confirm the cause before you buy a part.